
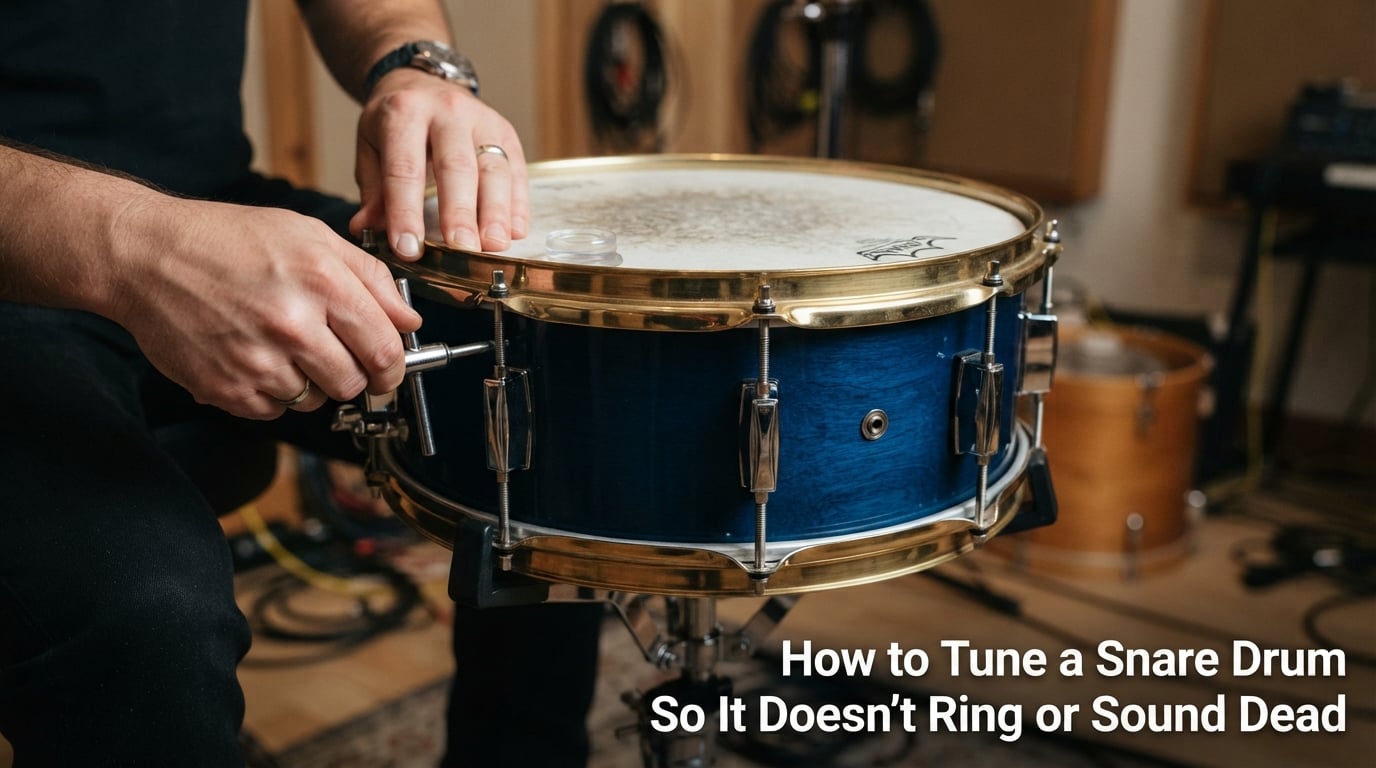
Learning how to tune a snare drum so it doesn’t ring is less about removing every overtone and more about putting the drum’s sound under control. A good snare has attack, body, and a short musical tail; a bad one either howls after the note or feels like someone put a pillow on it.
The fix comes from three connected adjustments: even tension at every lug, a sensible relationship between the batter head and resonant head, and snare wires that are tight enough to respond but not so tight that they choke the drum. Start with the drum itself, then add the smallest possible amount of muffling only if the musical setting still calls for it.
This guide gives you a repeatable way to tune a snare drum at home, rehearsal, or a recording session. You do not need a tuner to begin, although a tune-bot or other tuner can help verify that each lug is speaking at the same pitch.
Table of Contents
Start by finding the source of the ring
First, strike the center of the batter head at a normal playing volume and listen for what continues after the attack. A clear, short note is normal sustain; a single high whistle, a fluttering pitch bend, or a long wash of tones points to an uneven head, loose hardware, or an overtone that does not fit the sound you want.
A snare that sounds dead is a different problem. It usually has too little head tension, too much muffling, excessively tight snare wires, old heads, or several small fixes stacked on top of each other.
Quick definition: The batter head is the top head you strike. The resonant head, also called the snare-side head, is the thin bottom head that reacts to the note and makes the snare wires speak.
Do not judge the drum only from the stool. A tone that seems a little open from inches away often becomes focused at a few feet, especially when cymbals, guitars, and a room are involved.
Normal ring is part of a healthy snare sound
Many snares have audible overtones when played alone. If the note has a defined attack and decays smoothly, leave it alone before reaching for tape or moon gel.
Unwanted ring is more specific: it jumps out as one piercing pitch, lasts much longer than the rest of the note, or changes wildly from one part of the head to another. That is the sound to diagnose.
Loose parts can imitate a tuning problem
Before changing pitch, lightly touch the rim, lugs, throw-off, butt plate, tension rods, and any internal hardware while tapping the drum. If a rattle stops when you touch one part, tighten that hardware carefully rather than forcing the heads tighter.
Check that the snare wires sit centered across the bottom head and that their straps or cords do not rub against the hoop. A crooked wire set can create a papery buzz that no amount of batter-head tuning will cure.
Balance the two heads before trying to stop snare ringing
The batter head shapes much of the feel, attack, and perceived depth. The resonant head strongly affects sustain, sensitivity, and the crispness of the snare wires, so treating the bottom head as an afterthought makes tuning harder.
Both heads do not need to match in pitch. Similar tension tends to make a longer, more open note, while a higher snare-side head often creates a tighter response and a quicker, more compact decay.
The batter head sets feel and the main note
A looser batter head feels softer and produces a lower, broader note, but it can become floppy and dull if it is too loose. Raising it adds stick rebound and crack, yet too much tension can make the sound thin and can place needless stress on the drum.
For a controlled first pass, bring the batter head to a medium tension and clear it lug by lug. This gives you a usable reference before you make artistic choices about pitch.
The resonant head controls response and sustain
The snare-side head is much thinner than a batter head, so work in very small turns. Raising it can reduce the loose, splashy character of the wires and sharpen articulation; lowering it can make the drum broader but may increase a messy or sluggish buzz.
Players in drum forums often cite a snare-side reading around 440 Hz and a batter reading around 340 to 350 Hz as a starting point on some drums. Treat those values as a reference for a tuner, not a rule: diameter, shell, heads, playing style, and desired sound all change the right result.
Fresh, seated heads give you a fair starting point
A dented batter head, a stretched snare-side head, or a hoop that will not sit level can make a drum seem impossible to tune. If the head has deep stick dents, persistent wrinkles at a playable tension, or wildly shifting lug pitches, replacement may save more time than another round of adjustments.
When fitting a new head, place it squarely on the bearing edge, finger-tighten every tension rod, and press gently in the center with an open palm to help the collar settle. Recheck finger tension after seating because several rods may have loosened.
Warning: Do not use large turns on a snare-side head or keep tightening a stubborn rod. Stop if a rod feels unusually resistant, the hoop looks uneven, or the head approaches its safe tension; inspect the rod, lug, hoop, and bearing edge first.
Tune a snare drum in six controlled steps
Use this sequence when you want a snare that has life without an uncontrolled ring. Make one small change at a time, listen, and keep the change only if it improves the whole note.
Release the snare wires. Disengage the throw-off so the heads can speak without wire buzz masking their pitch.
Seat and finger-tighten the batter head. With the head centered and the hoop level, bring every tension rod to finger-tight contact.
Raise the batter head evenly. Turn each rod by the same small amount in a star pattern, moving across the drum rather than around the rim. Quarter turns are a sensible maximum for broad changes; use smaller moves as you approach the sound you want.
Clear the batter head. Tap about an inch from each lug, mute the center lightly with one finger, and match the pitches you hear. Correct only the lug that is low or high, then compare it with the others again.
Tune and clear the resonant head. Repeat the same star-pattern process on the snare-side head with smaller adjustments. Bring it to a medium-high, even tension before deciding whether it needs to go higher or lower.
Engage and set the wires. Turn the strainer knob until soft strokes activate the wires and a firm center hit still has body. Play the drum from the stool and at a few feet away before using any muffling.
The order matters because even lug pitch removes many harsh overtones before you try to change the drum’s overall pitch. If you hear a ring after Step 6, repeat the lug-tapping check instead of assuming that the drum needs tape.
Fast tuning checklist: wires off, heads seated, rods finger-tight, small star-pattern turns, lug pitches matched, wires set last, then listen from playing distance. This is the simplest answer to how to perfectly tune a snare drum without chasing random changes.
Small star-pattern turns keep the hoop level
A star pattern means moving to a rod across the head after each adjustment. On an eight-lug drum, choose one rod, then go across the drum, then to the next pair rather than tightening neighboring rods in a circle.
This distributes tension across the hoop and gives the head a better chance to settle evenly. The pattern is not magic, but it stops a common beginner problem: one side becoming far tighter than the other before you notice.
Lug taps tell you whether the head is cleared
Tap near each lug with a stick while lightly touching the center of the head to reduce its main note. Listen for relative pitch, not a perfect note name; two neighboring lugs that disagree clearly are enough to create an unpleasant overtone.
If one lug is lower, tighten it a tiny amount. If it is higher, loosen it a tiny amount, tap again, and compare all the lugs once more because a change at one rod affects nearby areas.
Write down a setting you like
Once the snare feels right, note the head type, approximate pitch or tuner readings, and how the wires feel. Photos of the tension-rod positions are less useful than notes about sound, because a rod’s visible position does not reveal its actual tension.
A short record makes it easier to return to a rock, pop, or jazz setting after you experiment. It also helps identify whether the drum is drifting after hard rimshots or whether your ears simply prefer a different pitch.
Set snare wires tight enough to speak, not tight enough to choke
Snare wires should react to gentle playing but allow the shell and heads to produce a full note. Start with the throw-off engaged and turn the tension knob until the wires stop sounding loose and floppy, then play a center hit, ghost notes, and a rimshot.
If the drum loses its body, sounds pinched, or produces a thin rasp on every hit, back the tension off slightly. If the wires sputter, slap against the head, or fail to respond to soft strokes, add a small amount of tension.
Wire buzz and head ring need different fixes
Wire buzz has a fuzzy, sandpaper-like character and is easiest to hear when the wires are engaged. Head ring has a pitched tone that remains when the wires are off, so disengaging the throw-off is the quickest way to separate the two issues.
Do not tighten the wires to hide a ring. That approach often removes sensitivity and leaves the underlying uneven head tension untouched.
Centered wires give a more even response
Look underneath the drum and check that the wire strands run straight across the snare beds. If they sit off to one side, release tension, realign the straps or cords, and retighten in small increments.
Also inspect the wires for bent strands. A damaged set may buzz unevenly at certain dynamics, which can feel like a tuning fault even when both heads are clear.
Reduce excess ring with tuning first and muffling second
To stop a snare drum from ringing without muffling, first clear both heads, check loose hardware, and change the relationship between the heads in small increments. A slightly higher resonant head or a small batter-head adjustment often shortens an ugly overtone while keeping the drum open.
If the unwanted pitch remains after those checks, use one small muffling point near the edge of the batter head. The aim is to soften the offending overtone, not erase the drum’s sustain.
A single small damper is usually enough
Try a small piece of gel, a narrow strip of tape with one end folded, or a thin ring resting on the head. Place it near the rim, strike the drum, and move it gradually around the head because placement changes which overtones are reduced.
Start with one damper. Adding several pieces at once makes it impossible to know which one helped and is the usual route to a cardboard-like snare sound.
Head choice changes how much control you need
A coated single-ply batter head commonly gives a sensitive, open response with brush-friendly texture and audible overtones. A clear single-ply head often feels brighter and more direct.
A double-ply batter head generally shortens sustain and emphasizes a thicker attack, which can suit a loud rock setting or a player who wants less overtone management. These are tendencies, not fixed rules; shell material, diameter, and tuning still matter more than a label alone.
Recording tip: Listen through the microphones or a quick phone recording before adding more dampening. A ring that feels large at the stool may disappear in a mix, while a dead snare rarely regains detail after recording.
Match the snare’s pitch and decay to the music
There is no single correct snare drum tuning frequency. Choose a starting pitch based on how much attack, body, and sustain the part needs, then test it against the song rather than judging it in silence.
Rock and loud live playing favor focus and attack
For rock, begin with a medium to medium-high batter head and a slightly higher, clear snare-side head. This usually produces a firm crack with enough body to survive guitars and cymbals, and a double-ply batter head can reduce stray overtones if needed.
Keep the snare wires responsive but not cranked down. A very tight wire setting can make rimshots feel smaller when you need the drum to cut through.
Pop and recording often favor a shorter controlled note
For close microphones, start with even heads and a moderate decay, then add a minimal edge damper only after hearing a recorded hit. The target is a repeatable attack without a high overtone that distracts from the vocal or backbeat.
Leave some life in the head. A snare that sounds overly dry in the room can become flat and small after compression and other mix processing.
Jazz and softer music favor sensitivity and openness
For jazz, use a responsive coated batter head at a tension that supports brush work and light stick strokes. Keep muffling minimal, and set the wires for clear ghost notes rather than a hard, compressed buzz.
Letting the note sustain can be appropriate here. The goal is not zero ring; it is a tone that joins the kit and the room without a sharp, isolated whistle.
Song context matters more than a note-name target
Some players tune a snare toward a song’s tonal center, especially when the arrangement leaves space around the drum. This can be useful, but do not force a head into an awkward tension just to reach a note name.
Choose the range where the drum responds well, then make a small pitch move if the music asks for it. A stable, clear snare usually serves the track better than a theoretical target that makes the head feel wrong.
Fix the common problems in the order they appear
A dull or cardboard-like snare needs less damping or more even tension
Remove every damper and disengage the wires, then strike the batter head. If the note is still short and flat, raise the batter head slightly in an even star pattern and verify lug pitches before touching the bottom head.
If the head has no rebound and looks worn or dented, replace it. Old heads lose their ability to produce a stable, lively note.
A snare that will not hold tuning needs a hardware check
After a new head settles, recheck each tension rod because seating can change tension. If one rod repeatedly loosens after rimshots, inspect its threads and the lug insert rather than simply over-tightening it.
Make sure the hoop is not bent and that the head collar is not pinched. A mechanical problem will keep returning until the part causing it is corrected.
A tom-triggered buzz is sympathetic vibration, not always a bad wire setting
When a tom note makes the snare wires buzz, the tom’s frequency is exciting the snare-side head and wires. Start by making the snare wires moderately taut, then make a small change to either the affected tom or the snare’s resonant-head pitch.
Change only one drum at a time and play the tom again. The goal is to reduce a distracting buzz in the actual kit setup, not to remove every bit of sympathetic response.
Different lug pitches mean the head needs another clearing pass
Tap each lug with the center muted and locate the low or high area. Use very small turns, then go around the head again because matching one lug does not prove that all the others are still even.
A tuner can make this faster, but your ears can do the job if you compare adjacent lugs patiently. Consistency is more useful than chasing an exact frequency.
Use the 80/20 rule to make faster snare tuning decisions
The 80/20 rule in drumming is a practical listening habit: spend most of your attention on the few adjustments that make the biggest audible difference. For snare tuning, those are even lug tension, the resonant-head relationship, and wire tension.
That means you should not spend twenty minutes moving gel around a head that has one low lug. Fix the large cause first, then make a small muffling choice only if the remaining sustain conflicts with the song.
I recommend making a short before-and-after recording whenever you feel stuck. Hearing two single center hits and a short groove after each change can reveal whether the drum improved or whether your ears became accustomed to a worse sound.
Warning: Avoid repeatedly raising tension in search of more focus. If the sound becomes thin, the rods feel hard to turn, or the head approaches its safe range, return to the last healthy setting and solve the issue with evenness, head choice, or a very small damper.
FAQs
How to stop a snare drum from ringing?
Clear both heads by matching pitch at every lug, check loose hardware, and set the resonant head and snare wires before adding any muffling. If one overtone remains, use one small damper near the batter-head edge and move it until it softens that tone without killing sustain.
How to perfectly tune a snare drum?
Disengage the wires, seat and finger-tighten the heads, then use small star-pattern turns to bring each head up evenly. Tap near every lug to match pitches, tune the snare-side head in smaller increments, engage the wires last, and judge the result from playing distance as well as the stool.
What is the 80 20 rule in drumming?
The 80/20 rule is the idea that a few changes create most of the result. In snare tuning, focus first on even lug tension, the relationship between batter and resonant heads, and sensible snare-wire tension before spending time on muffling or tiny cosmetic adjustments.
How to stop drums from ringing?
First decide whether the sound is normal sustain, an uneven-head overtone, a loose part, or sympathetic buzz from another drum. Clear the affected head lug by lug, tighten loose hardware, make a small pitch change to the interacting drum if needed, and use minimal muffling only after those checks.
How tight should snare wires be?
Snare wires should activate on soft notes without choking a firm center hit. Tighten until the wires no longer sound loose, then back off slightly if the drum loses body, feels pinched, or gives a thin rasp at every volume.
Use this order to tune a snare drum without deadening it
How to tune a snare drum so it doesn’t ring or sound dead comes down to a simple order: clear the heads, balance the batter and resonant head, set the snare wires, and muffle only the remaining unwanted overtone. Let the drum have a musical note before you try to shorten it.
On your next tuning pass, make one small change, play a short groove, and listen from a few feet away. That habit will get you to a reliable snare sound faster than any single pitch chart.